Free Simple Afghan Pattern for Beginning Knitters

Easy Garter Stitch Afghan With Scalloped Border
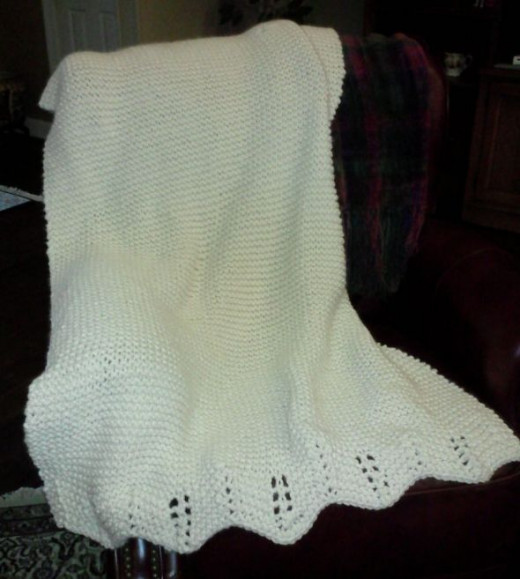
Light Color Yarn Shows Off the Stitches in this Plain Pattern
This pattern will produce a very plain, simple afghan. This makes it a great free simple afghan pattern for beginning knitters. The weight of the afghan will, of course, depend on the size and weight of the yarn chosen. This afghan was done in garter stitch using a soft, thick, washable yarn that yields a warm and heavy, but soft and cozy afghan that is great for cold winter weather, or chilly autumn days. It is a very simple pattern that is easy for beginners.
After seeing a similar afghan that I had made for my dad, my daughter wanted one, too. So, I made this afghan for her over the late-winter, spring, and summer of 2012. As my work progressed, initially, I created a lens and posted photos of the progression of her afghan, so she could watch it grow. That lens evolved into the one you are now reading. About that afghan for my daughter -- I liked it so well, I made a duplicate for myself.
Any plain knitted afghan or scarf can be embellished with many different finishes on the ends -- or not. The effect will take the eye away from the plainness of this pattern. That effect can also be accomplished with attractive yarn -- the darker the color, especially if variegated, the less noticeable the stitches will be.
Glossary of Abbreviations & Terms Used for This Pattern
K -- knit
K2tog -- knit 2 together
Slip or Sl -- simply slip a stitch from the lefthand needle to the righthand needle without working it.
PSSO -- Pass the slipped stitch over. This means, after slipping a stitch, then working the next stitch, you should pass the slipped stitch back over the next worked stitch.
Here is a closer view of the finished afghan made for my daughter. It is so soft and cuddly, I may have to make one for myself...
The Needles Used for this Project
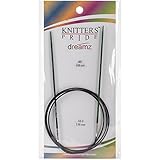
A Closer Look at Those Knitter's Pride Dreamz Needles

Varigated Yarn Distracts From the Plainness of the Pattern
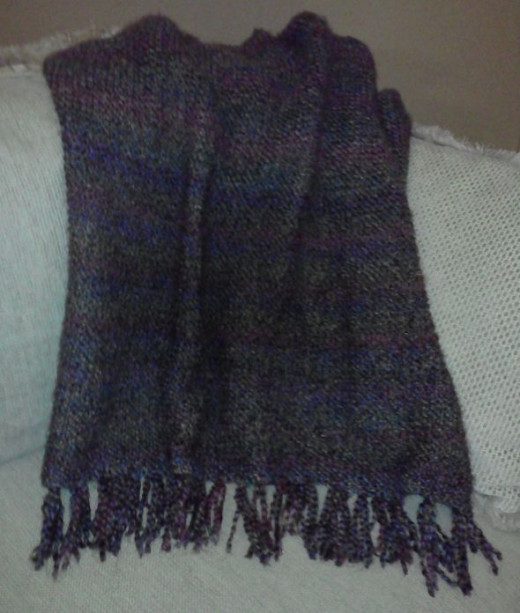
In this photo you see a heavy, nubby knitted afghan that I made for my dad before he passed away. As his illness progressed, he was always cold, no matter how hot the weather. It is done in plain garter stitch, but with fringe. The variegated yarn with shades of brown, blue, and purple take the eye away from the simplicity of the pattern. It was this afghan that was the inspiration for the one shown in the intro photo -- my daughter used it when home for a visit, and wanted her own just like it, but in a more neutral color.
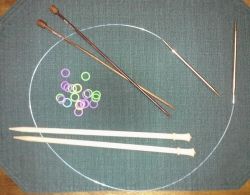
Here's What You Will Need
All you need are some knitting needles, stitch markers, and the yarn of your choice.
For an afghan, you will need circular needles. They are available in a variety of lengths. I prefer the 32" or 40" ones, as they can handles very wide afghans.
For a scarf, you will need straight needles. I recommend at least 10 inches in length.
This photo shows both types of knitting needles and the little flexible ring-shaped stitch markers.
Swatch for learning the gauge of this yarn.

The Test Swatch
Before beginning a knitting project, always make a little swatch, just to see how the yarn works up. Your swatch will show you how many stitches per inch your yarn will yield. The wrapper on the yarn tells you this, but it's best to see for yourself. It will also allow you to decide if your needle size gives the size stitch you want. You may decided to change to smaller or larger needles. The wrapper also tells you the recommended needle size to use with the yarn, but, again, you may want to decide for yourself.
This swatch is for the heavy, nubby afghan that my daughter requested. Because it is so plain, I have decided to add a scalloped border on each end. This will complicate the pattern, but you do not have to add a border.
The swatch in this photo is worked on a Brittany straight needle, made of birchwood. I have several brands of straight needles, made from various materials including bamboo and some very nice rosewood needles, but I'm not likely to purchase any brand of straight needles other than Brittany from now own. I only wish I had discovered them sooner.
The Yarn and the Gauge
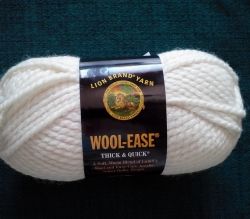
The photo below shows the yarn I used for this afghan. It is a winter white color called "Fisherman", by Lion Brand. This yarn is soft and fat or, as the label says, "Thick & Quick". It calls for size 11 needles. I tried it on a size 10 just to see what it would look like, but it really needs the size 11. When used on size 11 needles, it yields 2 stitches per inch. So, for a 36-inch-wide afghan, you should cast on 72 stitches. If you want do do this pattern with no embellishments, all you need to do is decide how wide you want your afghan (or scarf) to be, then cast on twice that many stitches.
Update: This yarn makes a warm and heavy afghan. It also "pills" and sheds. For my next heavyweight afghan, I will look for a yarn that does not do this.
The Yarn I used
The Pattern
The pattern is simple: Cast on the appropriate number of stitches to fit your desired size (as described above), then knit every row. That's it!
The knit stitch looks the letter "v". The purl stitch looks like little loops. The reverse side of the knit stitch looks like a purl. The reverse side of the purl stitch looks like a knit. By knitting every row, you achieve a pattern where every other row is raised (the reverse of the knit), the recessed rows are the front of the knits, and both sides are identical, so the finished product is reversible, with no right and wrong sides.
Adjusting for Trim:
Because I wanted to put a decorative trim on the ends of the afghan, I had to adjust the number of cast-on stitches to accommodate that pattern. The pattern I chose for the trim uses multiples of 15 stitches, plus 2 additional stitches at each end of each row of trim (a multiple of 15 plus 4).
I decided on a multiple of 5 which would give me 75 stitches (5 times 15), plus the extra 4 (2 on each end) for a total of 79 cast-on stitches. So, this afghan will be a tiny bit wider than the originally planned 36 inches. I could have used a multiple of 4 times the 15, but that, plus the extra 4 would have given me only 64 cast-ons, which would yield a more narrow afghan than I wanted.
Because the pattern repeats every 15 stitches, I have placed markers every 15 stitches. I have also placed 2 markers of a different color 2 stitches away from each end, to remind me that I should have 2 stitches left over after working the pattern repeats. After the embellishment is finished, and every row is knitted, those 2 markers won't be necessary. I will, however, leave markers in place because, as any experienced knitter will tell you, it is easier to check for a dropped stitch, when you know how many stitches should be between markers.
A caveat: if you choose to add an embellishment on the ends, that pattern may have a right and wrong side. This is something to consider when choosing your embellishment pattern. Using fringe, instead of a knitted trim, or using a garter stitch trim pattern will definitely maintain the reversibility of the finished product.
Garter Stitch Border
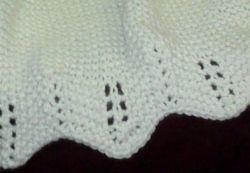
Finding The Perfect Border for This Afghan
I looked through many, many knitting pattern books without finding the perfect pattern. I finally decided to tweak several, and came up with the perfect pattern that maintained the reversability of the afghan, and kept the garter stitch pattern intact, while still giving me the scallops and little decorative holes that I wanted. It is very simple, with only 2 rows that are repeated until the border is the length you desire.
You should notice that rows 1 & 3 are identical. Row 1 is done once. Then rows 2 & 3 are repeated in that order until your project reaches the length desired..
NOTE TO BEGINNERS: Instructions inside brackets are repeated as many times as needed to reach the end of the row.
Row 1 -- K2, [K2tog, K5, YO, K1, YO, K5, Slip 1, K1, PSSO] K2
Row 2 -- Knit across. (Knit across entire row)
Row 3 -- K2, [K2tog, K5, YO, K1, YO, K5, Slip 1, K1, PSSO] K2
Do you knit?
My Favorite Brand of Straight Needles

How advanced a knitter are you?
Are you a knitter or crocheter? We needleworkers love to share patterns and tips. Thank you for visiting this page. I hope you enjoyed it, and that if you make this very simple pattern you will have fun doing it. Please "sign" my guestbook and let me know you dropped by for a visit.
This content is accurate and true to the best of the author’s knowledge and is not meant to substitute for formal and individualized advice from a qualified professional.
© 2012 MariaMontgomery


